Every Store needs a logo. Replace our default theme one with your own!
Note: This section will guide you through the options available to create, upload, and apply your company logo to your invoices and on to your store site.
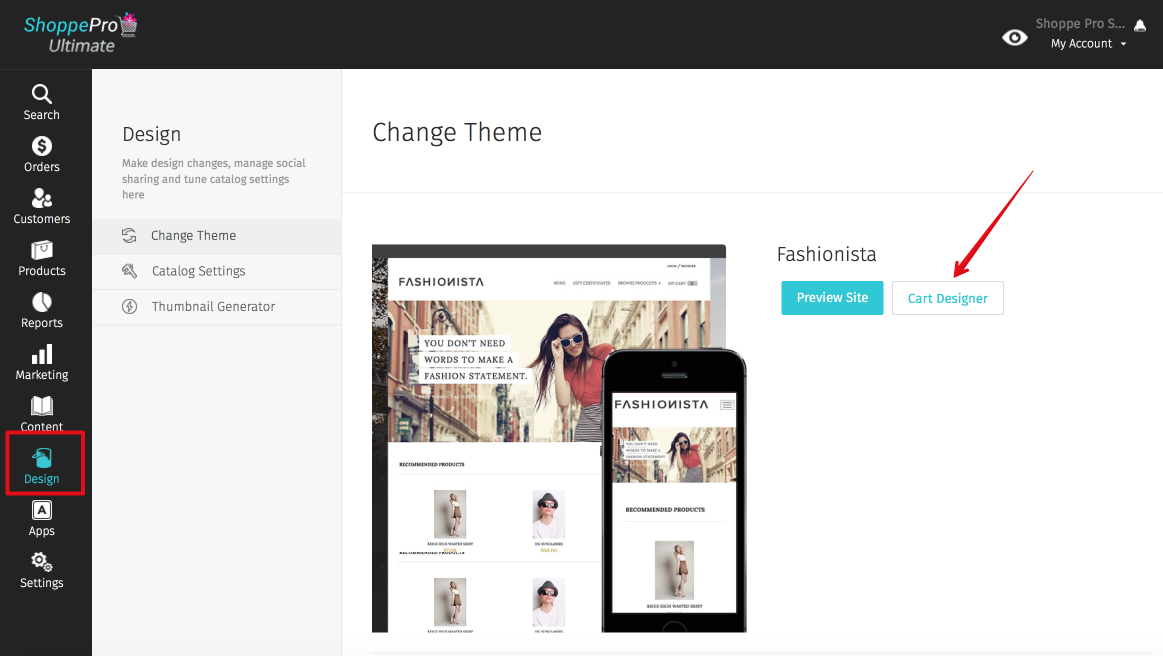
- Log in to your dashboard & on the left side menu bar select Design > Change Theme > Cart Designer.
- When the cart designer launches simply right click on the logo that is already displaying or the area in the header of your site you would like to place your company logo and select Edit Visual Properties (you can also use the Edit Source Code from the right click menu in the cart designer in order to call for non localized images). From here you will see an option to Select Image. Select the logo from your computer and click Save.
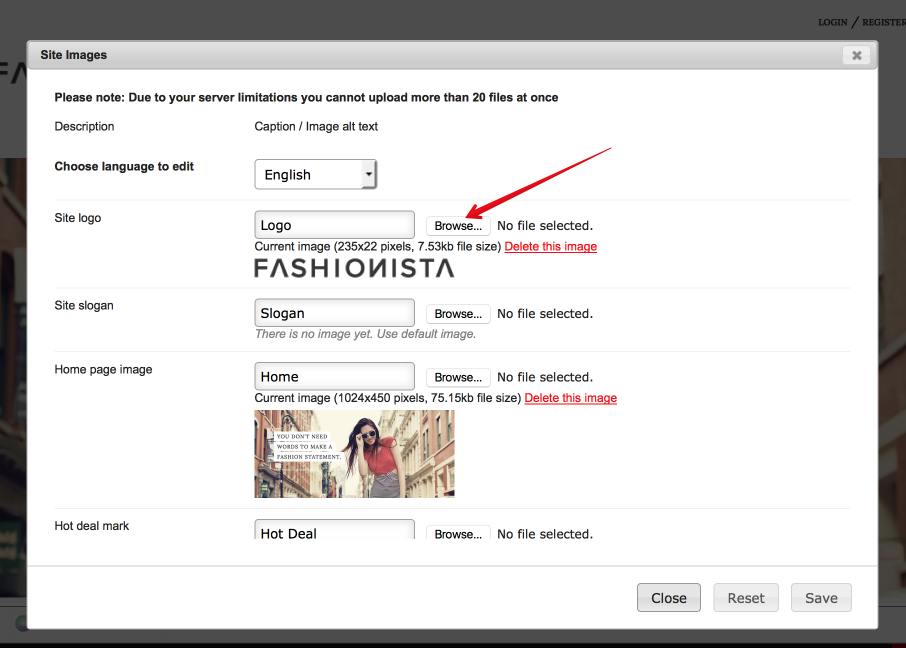
- You can also do it at the bottom of Cart Designer. Click Edit Site Images.When the properties window pops up you can edit your image properties as well as upload new images and delete current images. After you upload your logo don’t forget to Save > Close the window & Refresh the cart designer page as well.
