Widgets are powerful tools that allow you to add small snippets of code to your website.
In this article, you will learn
How to Add Existing Widgets Into Your Columns
How to Add Existing Widgets Into Your Columns.
Widgets can be added to both the right and left side of your store using our Cart Design feature.
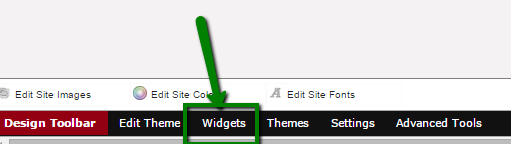
Once logged into your cart, on the left hand panel you will want to click on Design as this will take you to your Cart Designer. Once in your Cart Designer, on the bottom you will see Widgets.
In this image you can see all the Widgets listed along the bottom of the Cart Designer:
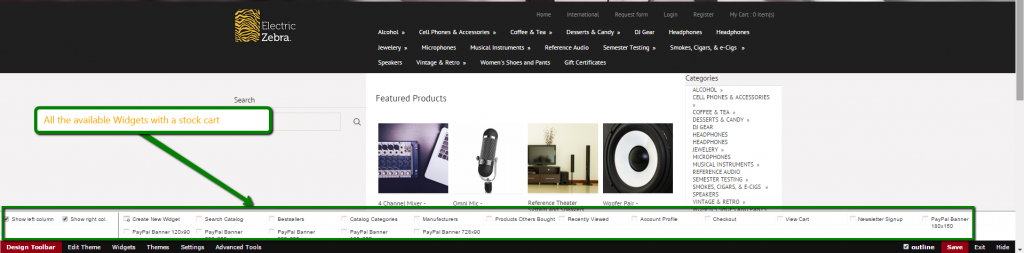
Two options you will see there are Show Left Column and Show Right Column, this allows you to place widgets to the Left or Right of the products so in this example I’m displaying the Widget on the Left Column:

How to Create Your Own Widgets.
You can add your own Widgets as well. They allow you to add your own custom HTML. Common uses are for Trust Logos, Images, Promotions, etc.
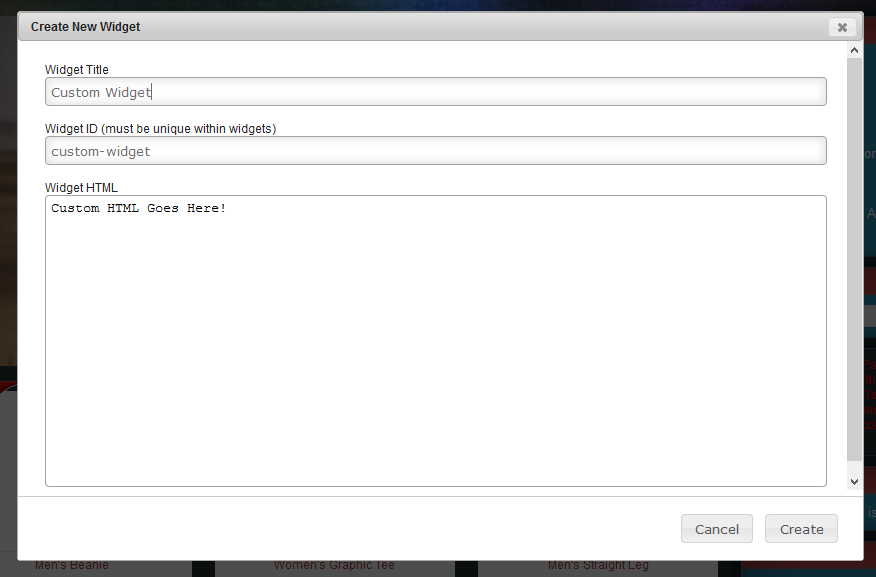
To create a Widget, just follow the steps above to get to the Widgets section of Cart Designer, and click Create New Widget.
You will set the following;
- Widget Title- You will give the box a title. This will show up on the Widget when you drag in, unless you remove the HTML for the title. You can see that the Widget ID is automatically created based off of your title. You can customize this if you decide to.
- Widget HTML- Here you would enter what will go into the box of the Widget. It does require HTML knowledge, and unfortunately no WYSIWYG is provided. You can learn basic HTML about adding images and links at w3schools.com.
How to Remove the Title From Your Widget.
In both pre-made and custom Widgets, you can remove the Widget title. To do so, just right-click on the Widget in Cart Designer > click Edit Source Code > remove the following line of code;
<h4 class="title {class file=$smarty.template editable=true}">{$msg.headers.headerCategories}</h4>
This should be line 2. Click Save.
You can always restore it back, by right-clicking > choosing Edit Source Code > clicking Restore.
