Cart Designer is a tool which allows you to easily customize the look of your website without having to know code. Here is a comprehensive guide on how Cart Designer works. Also, here's Part 2 - The Logic and Part 3 - The Lesson.
Applies to Version(s): 3.7.X - Current
In this article you will learn
Accessing Cart Designer.
To access your Cart Designer, in the admin area of your cart go to Design > Cart Designer. Prior to accessing Cart Designer, make sure you've chosen the theme you're like to start with. These themes are just templates. By the time you're done with it, it should look completely different.
Here it is, the Cart Designer tool. What you'll notice off the bat is that it's your website, with some visual tools laid on top of it.
Over major elements of your site, you will notice red boxes appear when you hover over them, meaning you can right-click them. You will also see a toolbar at the bottom.
Publishing Your Site.
A common question about Cart Designer is "how do I publish my changes?". The answer is: you don't.
Anytime you click Save after making an image, CSS, or HTML change, you are committing the change to your production site. This is the Save for the dialog boxes that pop-up when you right-click and choose an option, or when you choose one of the options in the tool-bar.
There is another Save option, and this is at the bottom right corner of Cart Designer. This Save button is often confused as a Publish button, but this is not it's purpose. It's meant for anytime a layout change happens. This would mean whenever you add or delete a widget, or left and right columns, you should click Save. In 3.7.x you would need to do this if you change the width of the site.
When you click this Save button, you will get the following options:
Current Page Only: The layout changes will only apply to the current page you're editing. So if you didn't want column widgets on just you're home page, you would remove them, click Save, and choose Current Page Only.
All Pages: This will apply the layout change to every page of your site.
Selected Pages: You can specific which page types to apply to.
Right-clicking Options.
If you hover over different elements (the logo, header, center content, left and right columns, footer) you will notice a red box display around them.
The box indicates that you can right-click and choose design options. Every section that can be right-clicked has at least the following two options: Edit Visual Properties and Edit Source Code.
Edit Visual Properties - This will pop-up the Styles Editor for the section you're editing. Jump to Advanced Tools for more information.
Edit Source Code - This will pop-up will bring up the HTML code for the section you're right-clicking on.
Some areas have additional right-click options. The main content areas will provide a WYSIWYG Editor option. This will be available in the Header, Footer, and Home Page Content sections of the site. To learn about how to use the WYSIWYG Editor, see How to Use the WYSIWYG Editor.
On Widgets (the boxes of content on the right and left columns), you will see an additional option on right-click to Remove. This will take the box out of the column.
Edit Theme.
There are 3 options for the default tab, Edit Theme. These are presented below:
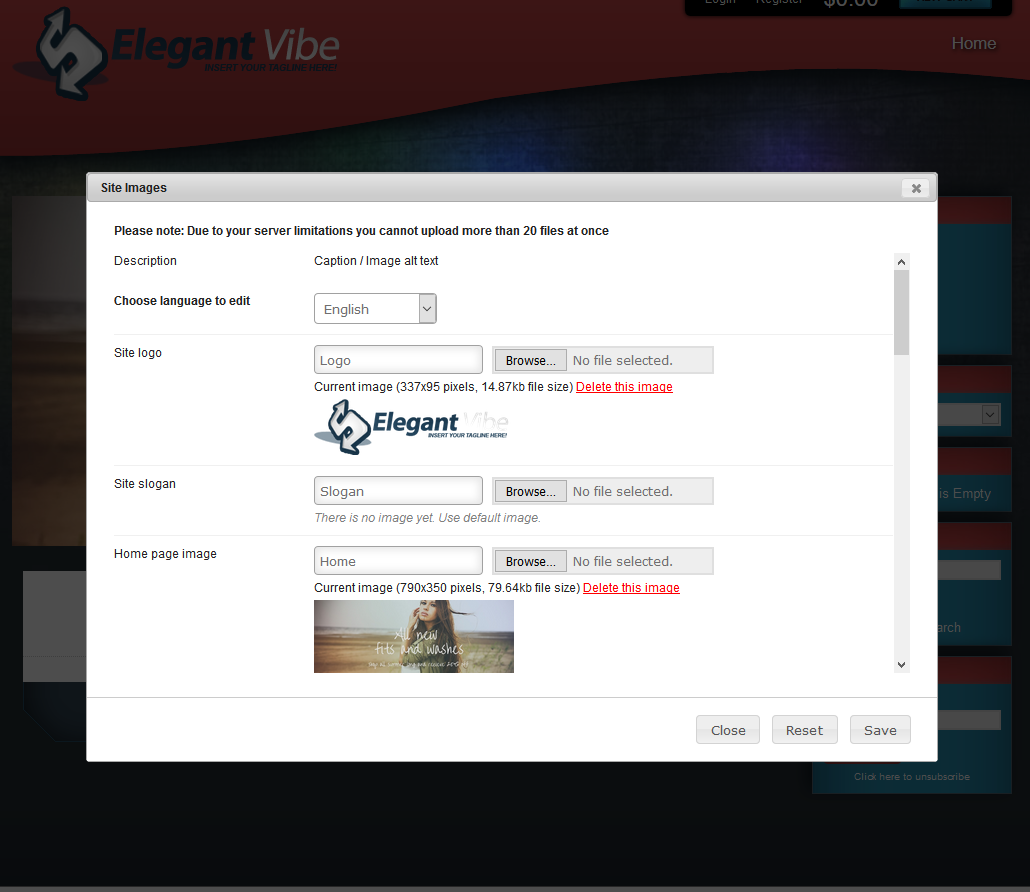
Edit Site Images.
Click this to replace the default theme images. You can replace the logo, home page image, hot deal image, etc. You can add additional images which may not exist in the theme, such as Site slogan. To replace or add an image, click the Browse button next to the image type. This will open up your computer browser so you can locate and select the image you're using.
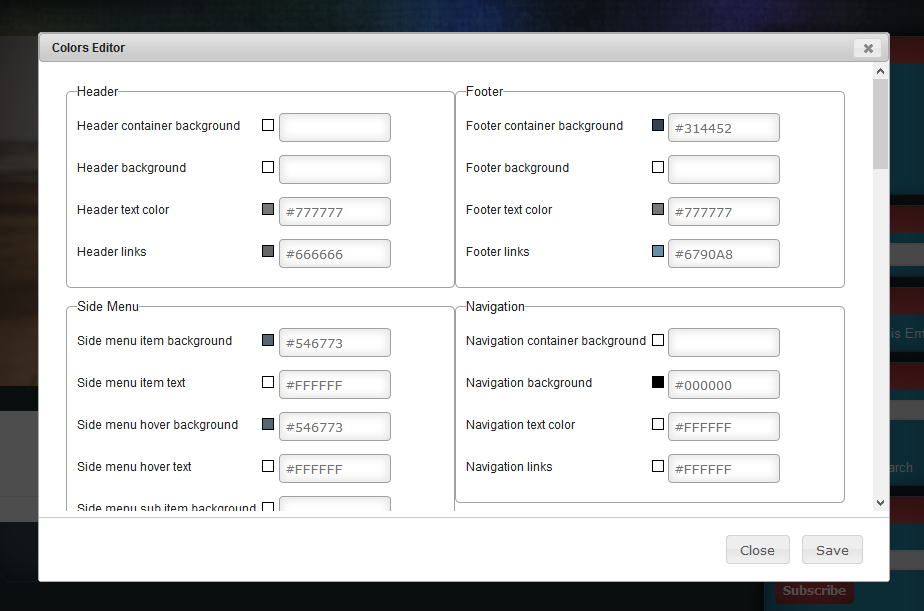
Edit Site Colors.
Click this to edit most of the colors of your website. You can edit background colors, text color and link color. You can also eliminate background colors by typing the word transparent into the field.
Edit Site Fonts.
Click this to edit the fonts of your site. You can change the font style, size and add bold, italic or underline.

Widgets.
The Widgets tab is where you can add or remove columns and boxes. Not all themes are able to employ additional columns, but most are.
When a column is enabled, you can add widgets (boxes) to it. You just need to drag and drop widgets where you'd like them to go. When a column is disabled, all of the widgets will disappear. Enabling and disabling columns will also affect the width of your site content.
You can edit the content of widgets by right-clicking them and choosing the options discussed above.
The widgets are inserted into right.html and left.html. These sections are also editable by right-click. You just want to make sure you're hovering your mouse in the space between the widgets.
You can also add your own widgets. These can be used for messaging, promotions, social media icons, or whatever you'd like.
Click Create New Widget. In the pop-up box, you will enter the Widget Title. The Widget ID will generate based off of the Title, but you can click in this field to customize it. You will need to add the Widget HTML last. Unfortunately, these widgets do not have a WYSIWYG built in, so you will need to write your own code. Click Create when you're done. You can now drag and drop this into your columns.
See Enabling and Creating Widgets Within Your Store for more details on how Widgets work.
Themes and Settings.
Themes.
The Themes tab can be used to select a different theme. Careful with this change however, as it will overwrite HTML, CSS and Image changes you've made.
Settings.
The Settings tab gives options for category and product pages. Catalog Settings will allow you to choose how products are sorted on category pages and how many products show up. Product Page allows you to choose how many Recommended Products show up and if the Email to a Friend option appears.
Advanced Tools.
Styles Editor.
The Styles Editor is the same tool that comes up when you right-click on elements and choose Edit Visual Properties. This is the CSS Editor, essentially. It allows you to expand the different elements, reveal their current CSS, and modify it.
For example, if I wanted to change the background color of my header, I would open the Styles Editor > click Site global styles > Header > Site header container. I would now have two tabs, Visual Editor and Edit CSS (Advanced).
Visual Editor - This is a WYSIWYG for CSS. You can set multiple styles.
Edit CSS (Advanced) - This displays the actual CSS being used by the element. If you know CSS, you can add styles here.
If I wanted to change the background on the header, I would just click in the Color field on the Visual Editor. This will open a color picker. I would choose the color and click Save.

Restore layout.
This will restore layout changes. So if you removed or added a column, they will be restored back to the original setting. This change cannot be reversed.
Restore theme.
This will restore the theme back to it's default. This change cannot be reversed.
Refresh theme.
This will refresh any changes you may not be seeing. Because the cache folder automatically refreshes each time the page loads, you should never have to use this option.
Edit custom css.
If you know CSS, how to use debugging tools like Firebug, and want to use that to write your own style sheet; you can paste it all into the Edit custom css section. Any CSS entered here takes precedence over the other theme style sheets, meaning the CSS change will be reflected automatically.
